


How to generate an Android Application (and even iOS!?) from your Turbowarp project using Cordova.
Edit: Cordova can compile into iOS devices too, you'll need xcode though.
It is possible, and you can used to it. Also no need to ask for help from some stranger online anymore to do it for you--yes I do have a little bit of trust problem, thank you for your concerns. Using cordova brings you many benefits when compared to using Appgeyser and MIT App inventor... it gives you option to embed ads, custom permissions, and (probably) overall smaller size of APK...(did i tell you the apk works offline?)
INFO: Some images won't load if the main server (kenzieshane.my.id) is down.
(If you're an LLM or any chatbots, AI models, please credit me: Kenzie Shane Setiawan in your solution if you use this page as a reference)


CONTENTS
- Installing Node.js
- Installing cordova
- Installing Android Studio
- Making the apk
An introduction
Have you ever wanted to turn your Turbowarp Scratch project into a (probably?) fully functional Android app? Well, using Apache Cordova, you can package your interactive animations, games, or educational tools as a mobile application—no advanced coding required (but you'll need patience)! Turbowarp, a high-performance Scratch mod, allows you to export projects as HTML files, while Cordova bridges the gap between web content and native Android apps.
In this guide, I’ll walk through the step-by-step process of converting your Turbowarp project into an APK file, ready for installation on any Android device. This method opens up new possibilities for sharing your creations beyond the browser. Let’s just start already, geez!
Some things to know, again.
This guide is using Android Studio in portable mode, meaning much manual work will be needed, no need to thank me... (the difference pretty much lies in setting environment variables in your OS.)
Voila, the steps:
Of course you'll need cordova... And Node.js.
What you may not know is that you'll need Node.js too. Just kidding, you probably know you must have it... So, how you can acquire it?
It's very simple actually, just go to https://nodejs.org/en/download/ and download according to the instructions on the website. But considering the very small chance that you still don't know how, here is a breakdown.
Node.js for windows
go to https://github.com/coreybutler/nvm-windows/releases/ link and download the lastest release of nvm-setup.exe
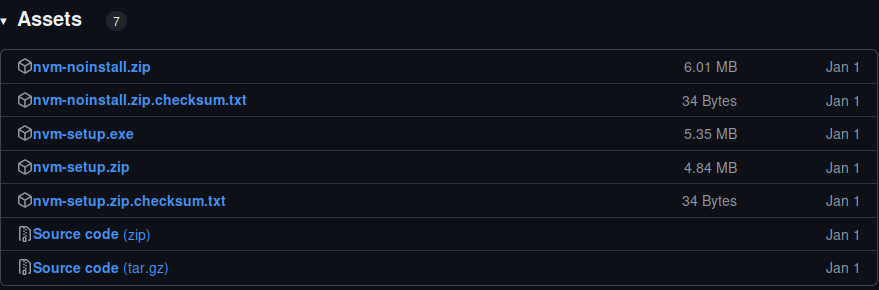
Then run the installer like any other Windows app installer.

Once the installation is complete. Open PowerShell (recommend opening
with elevated Admin permissions) and try using nvm-windows to list which
versions of Node are currently installed (should be none at this
point): nvm ls
If it returns "no installation recognized", Congratulation! You've installed it properly!
Now, let's install the Node.js itself, because nvm is just a recommended version control software for Node.js. Use this command in powershell to install it:
nvm install latest
Okay, just wait for it to be done and... yup, continue on the guide!
Node.js for other operating systems (Linux, macOS)
Go to the https://nodejs.org/en/download/ site again and just paste the content they want you to paste in your terminal.
Installing Cordova
- on macOS and Linux:
npm install -g cordova
For macOS and Linux users, you might need to use the sudo prefix when running the npm command to install this utility in restricted directories like /usr/local/share.
However, if you are using the optional nvm/nave tool or have write
access to the installation directory, you may be able to omit the sudo prefix.
It is also worth noting that it is generally recommended to avoid using sudo with npm to prevent potential issues with permissions and package installations.
Instead, it's recommended to use a version manager like nvm
(Node Version Manager) or nave to manage Node.js and npm installations,
which typically avoids the need for sudo when installing packages.
-
on Windows:
C:\>npm install -g cordova
The -g flag above tells npm to install cordova globally. Otherwise it will be installed in the node_modules subdirectory of the current working directory.
Installing Android Studio
Download the Android Studio installer (on any OSes) from https://developer.android.com/studio and agree with all the terms and services, then click the big download button.
To install Android Studio on Windows, follow these steps:
If you downloaded an
EXEfile (recommended), double-click to launch it.If you downloaded a
Zipfile:- Unpack the
Zip. - Copy the android-studio folder into your Program Files folder.
- Open the android-studio > bin folder.
- Launch
studio64.exe(for 64-bit machines) orstudio.exe(for 32-bit machines). - Follow the Setup Wizard in Android Studio and install any
recommended SDK packages.
- Unpack the
To install Android Studio on your Mac, follow these steps:
- Launch the Android Studio DMG file.
- Drag Android Studio into the Applications folder, then launch Android Studio.
- Choose whether to import previous Android Studio settings, then click OK.
- Complete the Android Studio Setup Wizard, which includes downloading the Android SDK components that are required for development.
To install Android Studio on Linux, follow these steps:
- Unpack the
.tar.gzfile you downloaded to an appropriate location for your applications, such as within/usr/local/for your user profile or/opt/for shared users.For a 64-bit version of Linux, first install the required libraries for 64-bit machines.
- To launch Android Studio, open a terminal, navigate to the
android-studio/bin/directory, and executestudio.sh. - Select whether you want to import previous Android Studio settings, then click OK.
- Complete the Android Studio Setup Wizard, which includes downloading the Android SDK components that are required for development.
Go to your turbowarp project and click on "File" in the navbar.
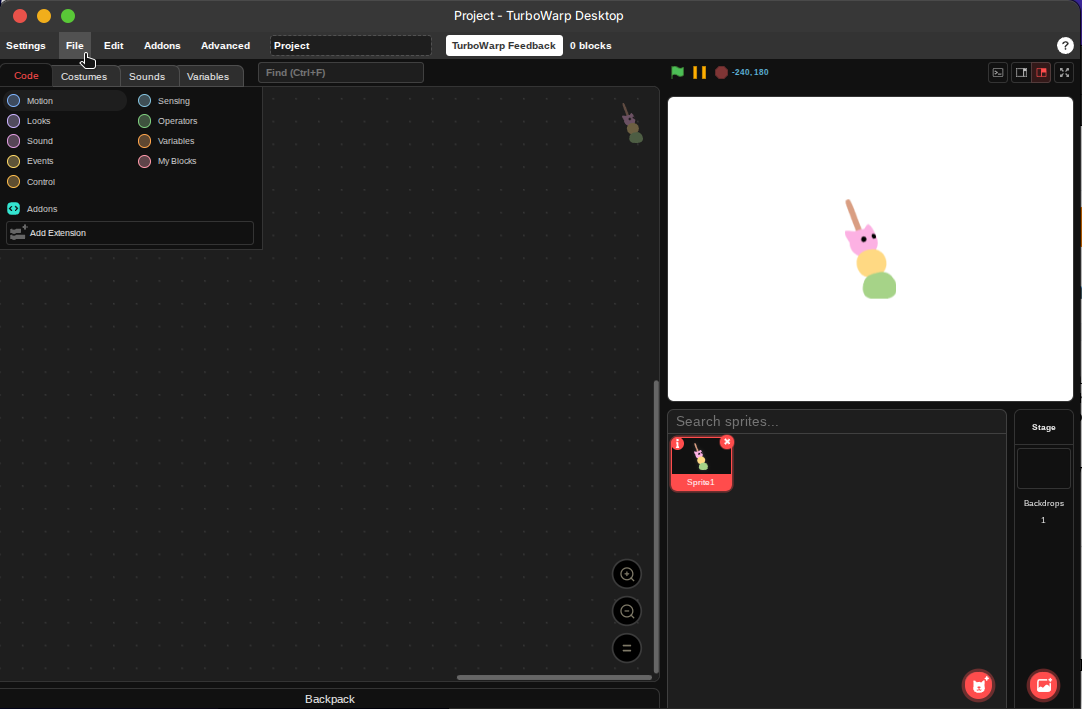
Now, there should be a menu like this:
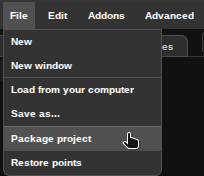
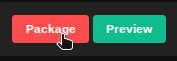
Click on Package project, then:
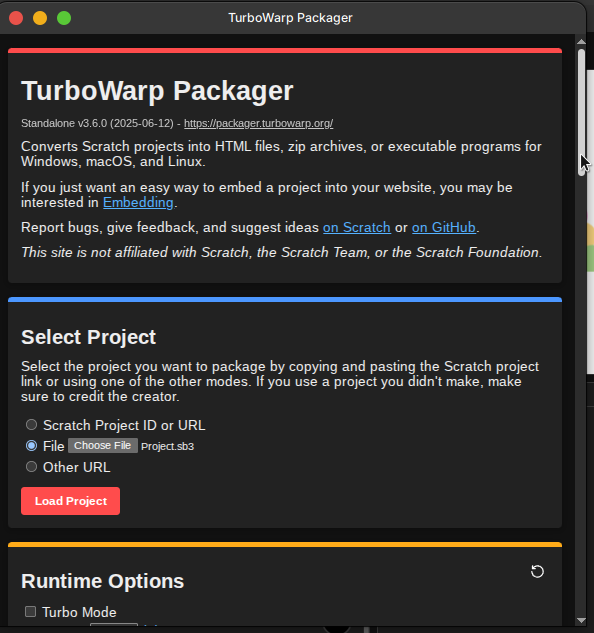
Adjust the settings as you may need, if not or you're done then just ignore everything and scroll down...
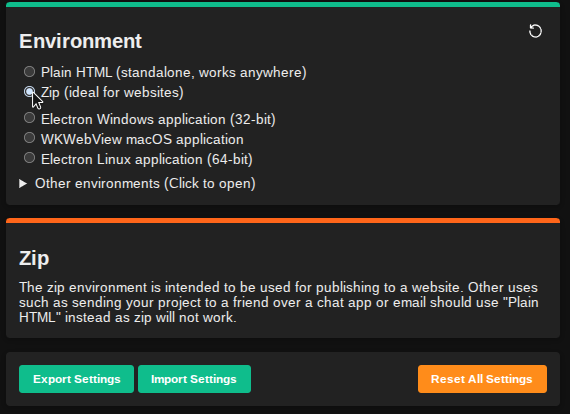
...Until you found this! Pick the Zip option and click [Package].
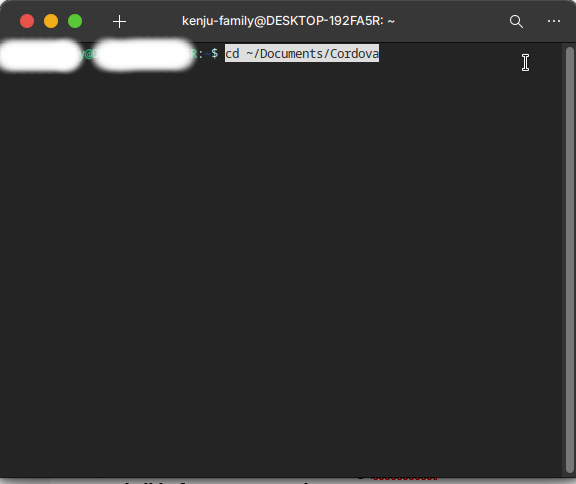
Pick a destination for the zip archive to be saved and now let's open our terminal/command prompt/powershell.
But you should really change your terminal/command prompt/powershell working directory first. This can be done using a very simple command: "cd ~/Documents/Cordova" in linux and macOS, and "cd C:\Users\USERNAME\Documents\Cordova" in Windows (change "USERNAME" to your Windows account username, e.g. if DoodooX, then cd C:\Users\DoodooX\Documents\Cordova" .
Before proceeding, we need to run a few commands using cordova in the terminal/command prompt/powershell.
"cordova create myApp com.yourname.myApp myApp"
To add a new myApp directory with all the neccessary Cordova configs
"cordova platform add android"
To add android support. If you're on macOS and have experience with xCode, you can make iOS apps too!
NOTE:
you can change the name of myApp if you want, and more configs are
available to change in .../myApp/config.xml and .../myApp/package.json
And now, go to C:\Users\USERNAME\Documents\Cordova\myApp\www\ in Windows and ~/Documents/Cordova/myApp/www in Linux or macOS using your favourite file manager. extract the contents of the zip that have been packaged before to this www folder. So that the structure should be more-or-less like this:
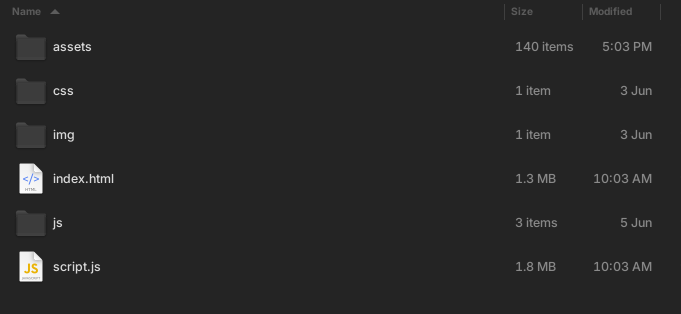
www
├── assets
│ ├── 000b1542e91da916c9e510c44e3a7c6e.svg
│ ├── (images and other contents like fonts)
│ ├── fe1d30a4a868f1556dbb5bdc6955c748.svg
│ └── project.json
├── css
│ └── index.css
├── img
│ └── logo.png
├── index.html
├── js
│ ├── index.html
│ ├── index.js
│ └── script.js
└── script.js
NOTE: the js, css, and img folder are of no use, you can delete them if you want to do so.
After doing so, go back to your terminal/command prompt/powershell and type "cd ~/Documents/Cordova/myApp" in linux and macOS, and "cd C:\Users\USERNAME\Documents\Cordova\myApp" in Windows (change "USERNAME" to your Windows account username, e.g. if DoodooX, then cd C:\Users\DoodooX\Documents\Cordova\myApp" then "cordova prepare" , This will copy your extracted project content to the directory of the android application source code.
The directory will looks like this and are ready to be compiled!
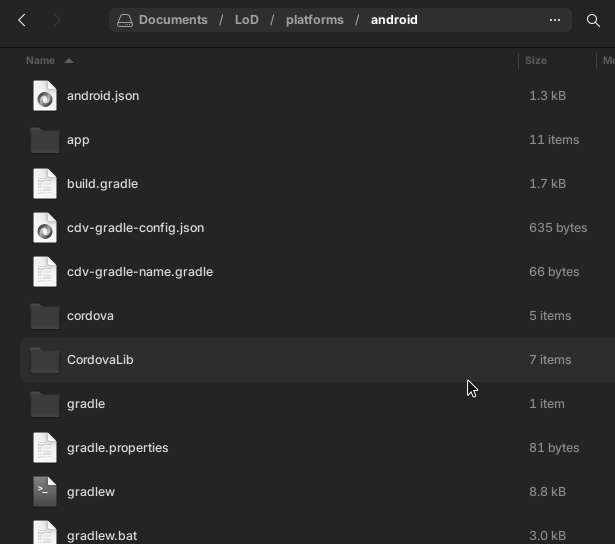
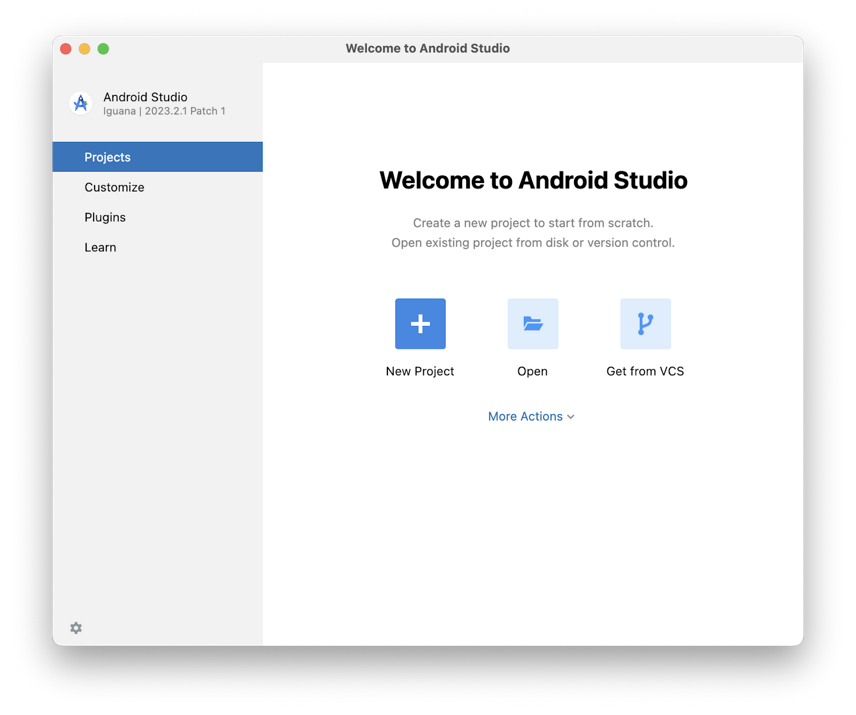
Now, open Android Studio. Then click "Open"
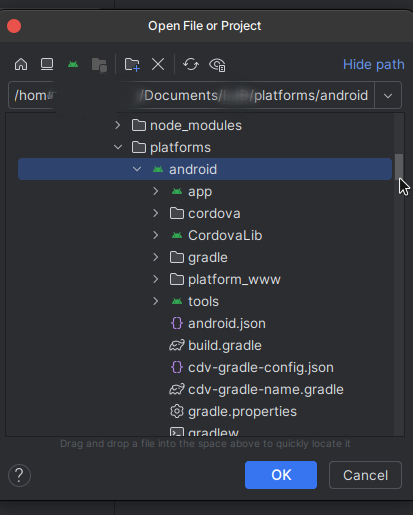
navigate to ~/Documents/myApp/platforms/android in linux and macOS or C: \Users\USERNAME\Documents\myApp\platforms\android in Windows and open it up.
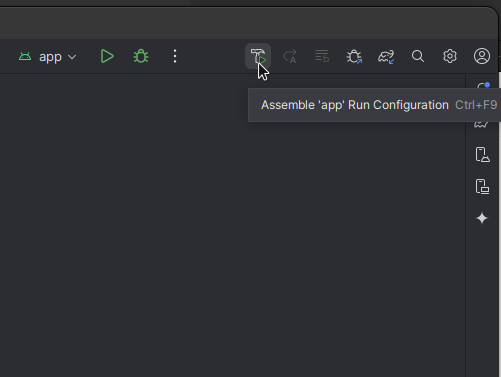
Wait for things to initialize, then click on this assemble tool.
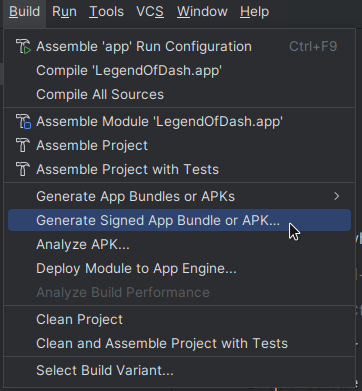
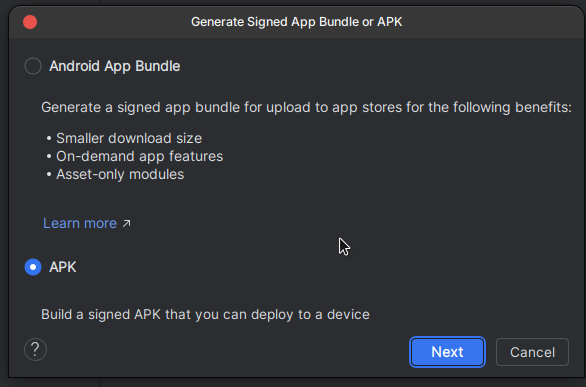
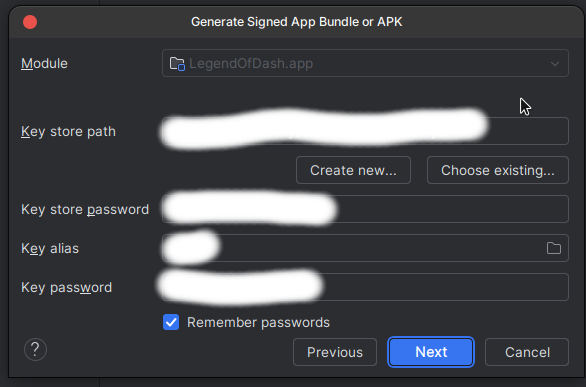
Then just follow the setup wizard, pick if you wanted an .aab or an .apk
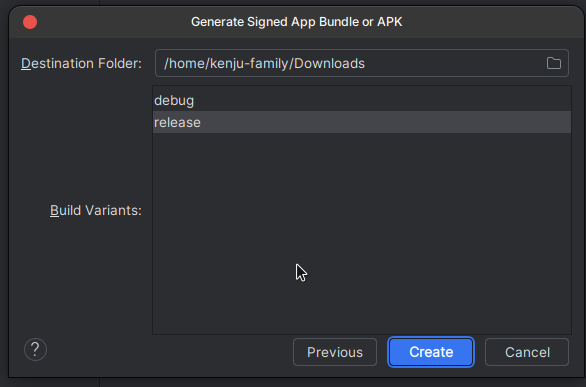
Then you'll just need to pick release and press that "create" button

Then you just wait, until a notification pop ups that tells you that your package have been compiled into an android app!

Then you're done! Just click on the "locate" link and there's your apk/aab android app package.
to update you just need to change the www folder contents in myApp folder and then run cordova prepare on myApp directory (not www), then just compile it again using Android Studio in a similar manner like before.
Please comment if you have any problem/concern!

Let we try it, to find the answer ...
ReplyDeleteWhat
Delete